How to Read Hunting Maps Before You Set Foot in a Unit
Research method: This guide synthesizes official mapping and land-management sources and is not presented as firsthand hunting experience. Verify current hunt boundaries, access rules, closures, and travel designations with the responsible wildlife agency and land manager before acting.
Learning how to read hunting maps is not about predicting exactly where an animal will be. It is about turning a large, unfamiliar place into a series of questions you can verify.
Good map work begins with legality and access, moves through terrain and habitat, and ends with a route that a real hunter can execute safely. The objective is not to collect hundreds of waypoints. It is to build a small number of defensible plans, understand what could invalidate each one, and arrive knowing what to check first.
The map-reading sequence
- Verify the hunt boundary, ownership, and legal access.
- Read the unit at broad, drainage, and route scales.
- Translate contour lines into terrain.
- Connect terrain with habitat, water, season, and likely pressure.
- Measure routes, turnaround points, and pack-out demands.
- Create primary and alternate plans.
- Download offline coverage and carry an independent backup.
- Validate every map hypothesis in the field.
1. Separate boundary, ownership, access, and travel
These four layers answer different questions. Treating them as interchangeable is one of the fastest ways to create an unusable or illegal plan.
- Hunt boundary: where the license or season is valid.
- Ownership: who owns or administers a parcel.
- Legal access: whether you may reach or enter it by the proposed route.
- Travel management: which roads, trails, vehicles, dates, and uses are permitted.
Public ownership does not guarantee a public route to the parcel. A line shown as a road does not prove it is open, maintained, passable, or legal for the intended vehicle. A private-land overlay does not grant permission or resolve a disputed boundary.
The Bureau of Land Management advises hunters to confirm closures and restrictions with the local office and notes that crossing private land to reach public land requires landowner permission. Start with the appropriate official source, such as the BLM hunting and fishing guidance, a current Forest Service motor-vehicle use map, a state land office, county records, or the responsible field office.
Access audit
- Confirm the exact hunt boundary from the current wildlife agency.
- Identify the land manager for every intended access point and camp.
- Check easements, permission requirements, seasonal gates, fire restrictions, and closures.
- Verify motorized designations using the current official travel map.
- Call when a road, crossing, or boundary question could decide the hunt.
- Record the source and the date it was checked.
2. Read the unit at three scales
Do not begin by zooming into one attractive ridge. Move from the whole unit to a drainage and only then to the route you might walk.
| Scale | Primary questions |
|---|---|
| Unit | Where are the major elevation bands, road systems, wilderness blocks, private-land barriers, burns, winter range, and broad habitat changes? |
| Drainage | How do cover, feed, water, aspect, access, glassing positions, and escape terrain connect? |
| Route | Can the hunter reach, hunt, retreat, and pack out through the specific terrain under expected conditions? |
At unit scale, eliminate places that fail the hunt brief. At drainage scale, form hypotheses. At route scale, test whether those hypotheses are physically and legally reachable.
3. Translate contours into terrain
USGS explains that contour lines connect points of equal elevation and allow a two-dimensional map to show the shape and steepness of the ground. The USGS topographic-map overview is a useful primer, while topoBuilder can generate current OnDemand maps at several scales.
- Close contours: steeper ground.
- Wide contours: gentler ground.
- V shapes pointing uphill: draws or drainages.
- Contours bending downhill: ridges or spurs.
- Low point between higher features: saddle.
- Flattened spacing within a slope: bench or terrace worth inspecting.
- Closed loops: a hill or depression, interpreted with labels and contour marks.
Always read the contour interval and scale. A route that looks manageable on a small-scale regional map may contain cliffs, broken ground, or substantial elevation change that only appears at a more detailed scale.
Calculate the work
- Measure horizontal distance instead of estimating by eye.
- Add cumulative ascent and descent, not only the difference between start and finish.
- Account for side-hilling, deadfall, loose rock, snow, mud, stream crossings, and darkness.
- Calculate the return and pack-out, not merely the approach.
- Set a turnaround time before entering the route.
4. Read aspect as a changing condition
The direction a slope faces influences solar exposure, snow retention, moisture, vegetation, wind, and daily temperature. But aspect is not a universal animal-location formula. Its effect changes by latitude, elevation, season, weather, and local cover.
Use aspect to ask better questions: Which slopes may green first? Which may retain snow or moisture? Where could shade persist? Which route may become icy? Then compare imagery, vegetation layers, recent conditions, and field observations before treating the answer as useful.
5. Connect feed, cover, water, and security
Animals use systems, not isolated pins. A promising area usually deserves attention because several needs connect within a workable distance and the terrain offers movement or security.
- Feed: openings, burns, meadows, shrub fields, agricultural edges, or seasonal plant communities appropriate to the species.
- Cover: timber, brush, broken terrain, thermal protection, and locations that reduce visibility.
- Water: mapped and seasonal sources, with reliability verified rather than assumed.
- Security: distance or separation from roads, trails, camps, glassing exposure, and repeated disturbance.
- Movement: saddles, benches, ridge systems, drainages, edges, and routes connecting seasonal needs.
Turn every interpretation into a hypothesis. “This bench connects feed and bedding cover” is testable. “Elk will be here” is not. Map confidence should determine the order you scout, not the certainty of the prediction.
6. Model hunting pressure without pretending to know it
Maps can reveal likely access and concentration points, but they cannot show every hunter, outfitter camp, private-land movement, road condition, or local tradition.
- Mark major trailheads, roads, easy glassing pullouts, camp corridors, and short routes into attractive terrain.
- Identify barriers that concentrate travel: private parcels, cliffs, rivers, gates, and limited crossings.
- Look for alternate routes that are legal and physically realistic, not merely farther from a road.
- Prepare to observe vehicles, camps, tracks, and glassing activity on arrival.
- Set a trigger for moving rather than reacting emotionally to the first sign of competition.
Distance from a road is not the same as low pressure. A well-known destination five miles in may receive more use than overlooked terrain near legal access. Treat pressure as something to measure in the field.
7. Design the hunt and pack-out together
Every promising area needs an exit plan that still works after a successful shot, a weather change, or a delayed recovery.
- Primary approach, alternate approach, and a no-go boundary
- Glassing locations and what terrain is hidden from each one
- Safe route in darkness or deteriorating weather
- Reliable water and emergency shelter options
- Pack-out distance, elevation, side-hilling, crossings, and number of trips
- Meat-cooling locations and time to vehicle or additional help
- Communication gaps and check-in points
A pin that produces an unrealistic pack-out is not a complete plan. Measure the most difficult return route using the load, temperature, daylight, and party capacity expected after a harvest.
8. Build a small waypoint system
Use consistent names and categories so the map can be understood quickly by every member of the party.
| Waypoint type | What to record |
|---|---|
| Access | Source, legal status, gate or permission, and date verified |
| Camp | Water, exposure, regulations, capacity, and alternate |
| Glassing | Field of view, hidden terrain, approach, and wind exposure |
| Hypothesis | Why the location matters and what evidence would confirm or reject it |
| Hazard | Cliff, crossing, deadfall, private boundary, weather exposure, or route restriction |
| Decision point | Time or condition that triggers return, reroute, or alternate plan |
A few useful notes are better than a screen full of unexplained icons. Include the source and confidence level for details that were not personally verified.
9. Prepare offline redundancy
- Download the entire hunt area, travel corridor, and alternate area before leaving service.
- Open the offline map in airplane mode to confirm it actually works.
- Carry power appropriate to trip length and cold conditions.
- Ensure at least one partner has an independent copy.
- Carry a paper topographic map and compass when the consequences justify it—and know how to use them.
- Record critical coordinates and contacts outside a single app.
The USGS topoView and National Map provide downloadable topographic resources. Commercial apps can add useful ownership and hunting layers, but no single device, dataset, or subscription should be the only path home.
10. Validate the map in the field
- Confirm access, gates, parking, signs, and road conditions before committing to the route.
- Check water, vegetation, visibility, animal sign, travel time, and physical difficulty.
- Record where the map or assumption was wrong.
- Update hazards, routes, and confidence while the details are fresh.
- Remove failed hypotheses instead of preserving every waypoint.
The best scouting note is often a correction. A hidden cliff, dry spring, locked gate, noisy surface, or longer-than-expected climb can improve every later decision if it is recorded honestly.
Put the map work into a complete hunt plan
Map research is most useful when it connects to the rest of the hunt. Use the big-game hunt planning checklist to verify licensing, travel, safety, meat care, and backup plans, then build a hunt-specific system with the big-game hunting gear list. For species and state coverage, continue to the elk hunting hub or mule deer hunting hub.
Map-publication standard
When publishing maps or screenshots, protect specific hunting locations, private information, access relationships, and sensitive wildlife areas. Review the provider’s terms and obtain permission when required. Prefer original diagrams, properly licensed government maps, or generalized examples that teach the method without burning a location.
A useful hunting map does not eliminate uncertainty. It organizes uncertainty into legal routes, testable habitat questions, measurable physical demands, and clear decisions. That is what makes it valuable before the first boot hits the ground.
Source review: USGS topographic-map guidance, National Map, topoView, and topoBuilder; Bureau of Land Management hunting and access guidance; U.S. Forest Service motor-vehicle use map guidance. Links reviewed August 20, 2026. Verify current regulations, access, closures, and travel designations with the responsible wildlife agency and land manager.
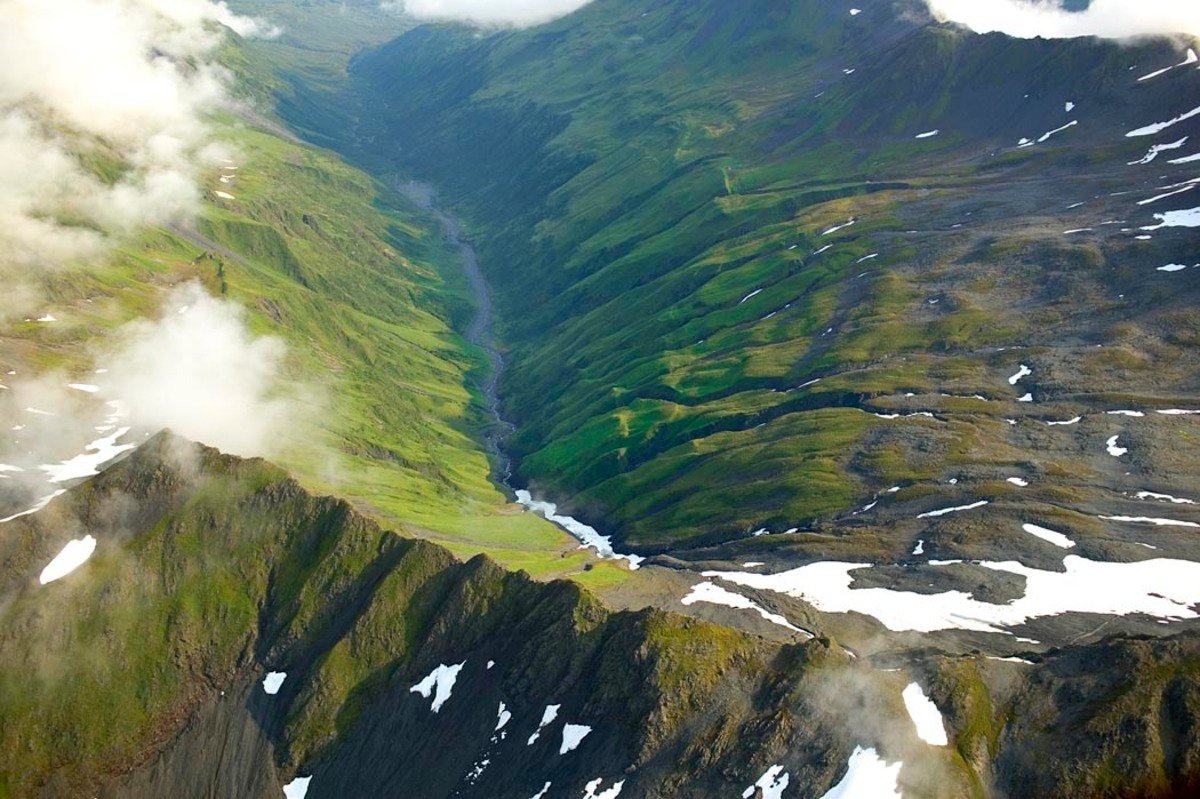
Featured photograph: Mountain ridges and river valley at Kodiak National Wildlife Refuge, Alaska, by Steve Hillebrand/USFWS, public domain. Used to illustrate terrain features, not a recommended hunting route or proof of access. Photo source checked September 11, 2026.